Using Image Markup on a Form
Image Markup allows you to mark up client photos and image templates on forms using different annotation tools.
With Image Markup, you can:
Draw on an image to emphasize specific areas and write notes
Add shapes like arrows or rectangles to identify target areas
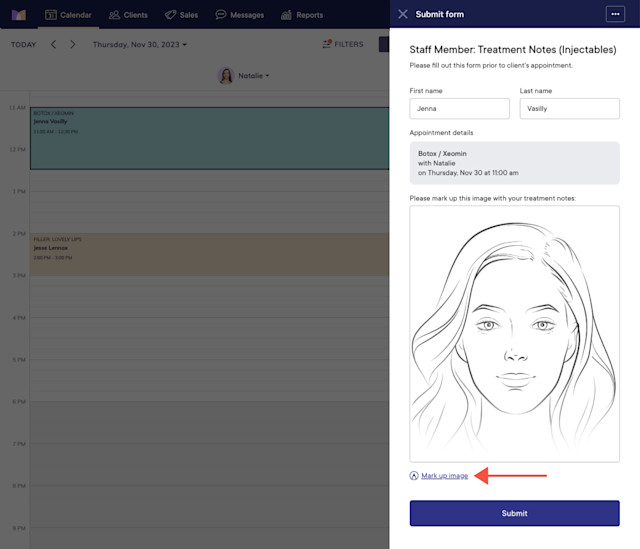
Use comments on staff member forms to document important details, such as units used for injectable services
To learn more about Image Markup, the following on-demand videos are available:
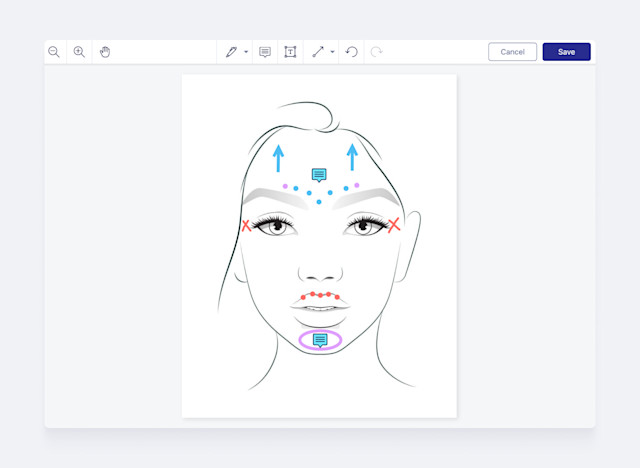
Image Markup is available on all forms, including client, staff member, and external forms.
On client forms, a client can add their own photo to the form and mark up the photo themselves before their appointment.
On staff member forms, a staff member can add the client’s photo to the form and mark up the photo as needed.
Link copiedUsing Image Markup
To use Image Markup on a form, create a form template and add the Image Markup field.
You can add as many Image Markup fields as needed to the form. This allows you to mark up multiple images on the same form.
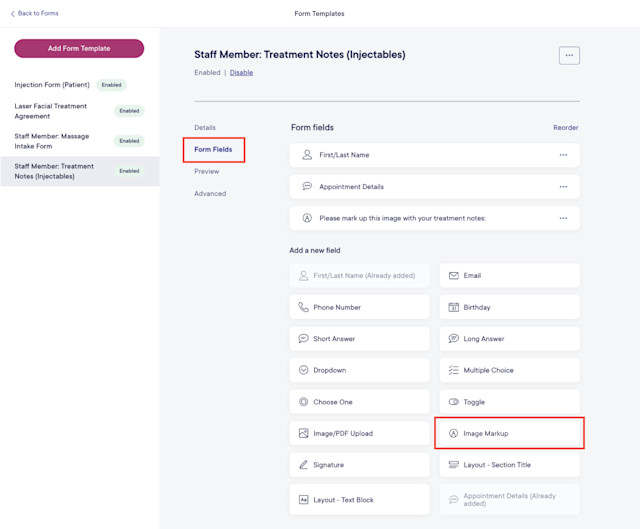
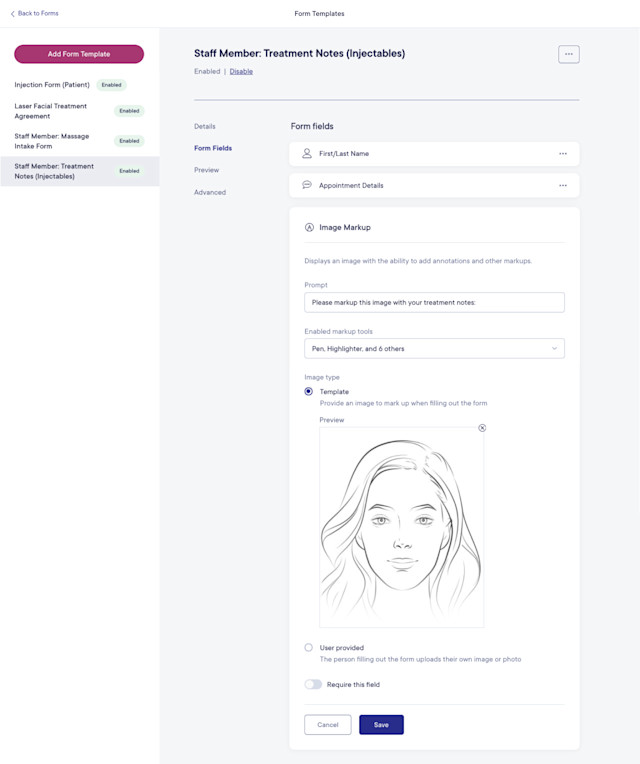
Update the Image Markup field settings and select Save.
Prompt: This text appears directly above the image on the form.
Enabled markup tools: Select the markup tools that should be available when marking up the image.
Template: Select this option to use an image template on the form.
User provided: Select this option to add the image to the form when the form is filled out.
Require this field: Enable this toggle to require the image to be added and marked up.
Select the Preview tab to see what the form will look like when enabled.
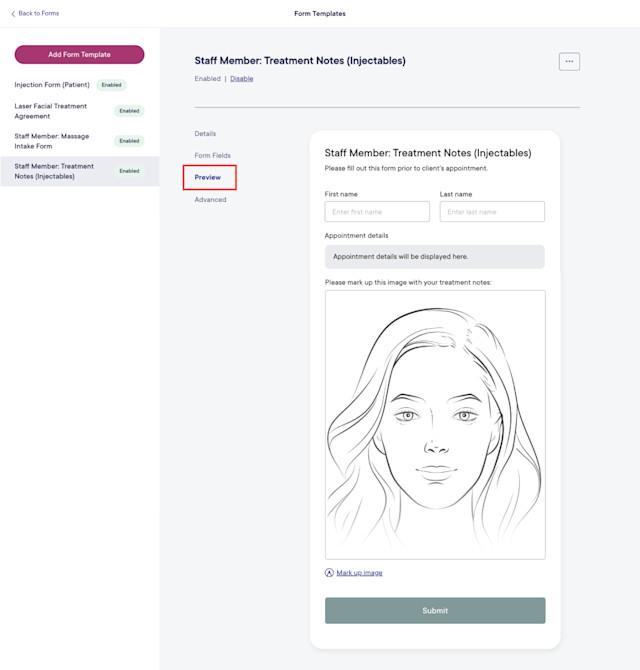
Once the form template is enabled, select Mark up image on the form to mark up the image.
Link copiedUsing image templates
The following face and body chart templates are available to download for free and use on your forms:

Can't find what you're looking for?
with us to talk to a real person and get your questions answered, or browse our on-demand videos.