Customizing Automated Messages
This article covers how to:
Set appointments to Unconfirmed or Confirmed
Add custom text to automated messages
Change the timing of automated messages
Learn more about enabling and disabling automated messages and how you can use multiple phone numbers for your automated text messages if you have multiple locations.
Cancellation policies should be added separately by opening the Settings app and selecting Calendar & Appointments > Cancel & Reschedule. Once added, the policy will appear in all notifications.
Link copiedSet appointments to Unconfirmed or Confirmed
When an appointment is booked, the appointment status will be set to either Unconfirmed or Confirmed, depending on your settings.
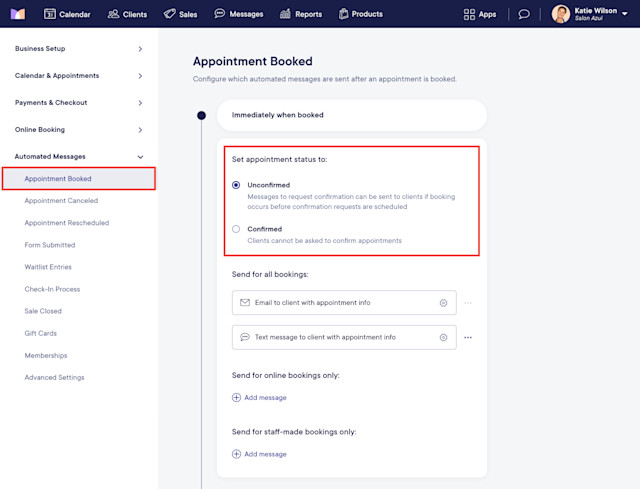
To choose whether appointments are set to Unconfirmed or Confirmed, open the Settings app and select Automated Messages > Appointment Booked.
Unconfirmed: All appointments will be automatically set to Unconfirmed. However, appointments that are booked after the appointment confirmation requests are scheduled to be sent will be automatically set to Confirmed. For example, if your confirmation requests are scheduled to go out 3 days before the appointment, but the appointment was only booked 2 days in advance, the confirmation requests will not be sent, and the appointment will be automatically set to Confirmed.
Confirmed: All appointments will be automatically set to Confirmed. Appointment confirmation requests cannot be sent.
Link copiedAdd custom text to automated messages
To add custom text to an automated message, open the Settings app and select Automated Messages.
Select the automated message category (Appointment Booked, Memberships, etc.)
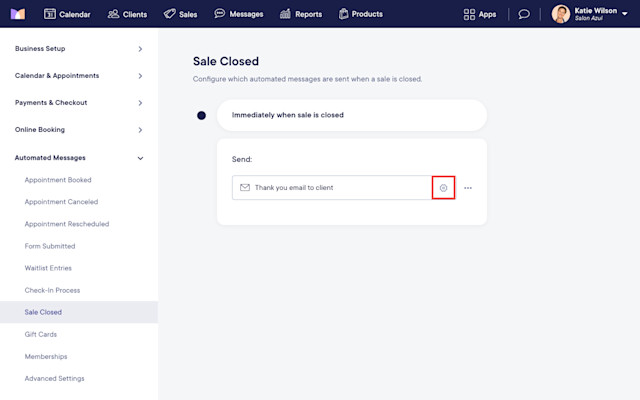
Select the gear icon next to the message.
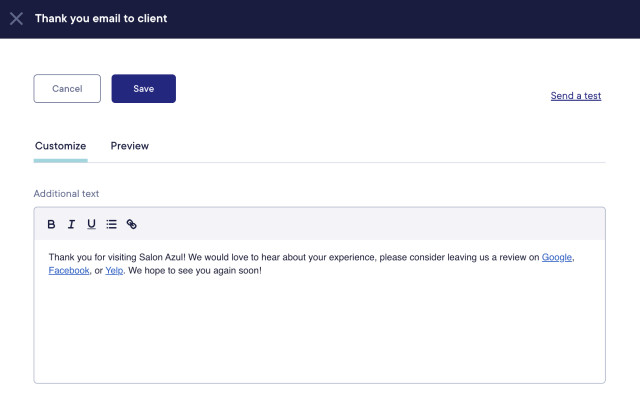
Select Customize to edit the message. You can select the Preview tab to preview what the message will look like to clients. You can also send yourself a test by selecting Send a test and entering your email address or phone number.
Link copiedChange the timing of automated messages
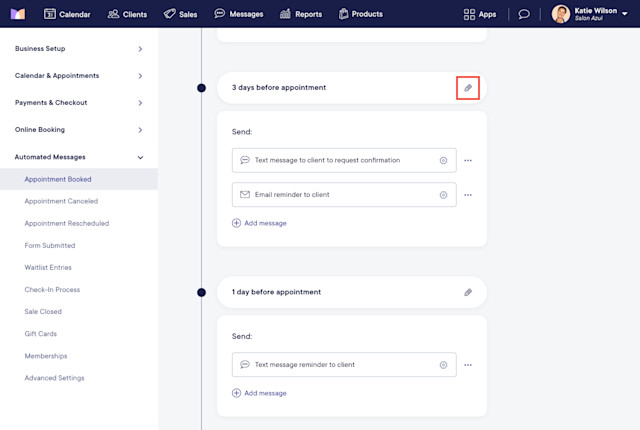
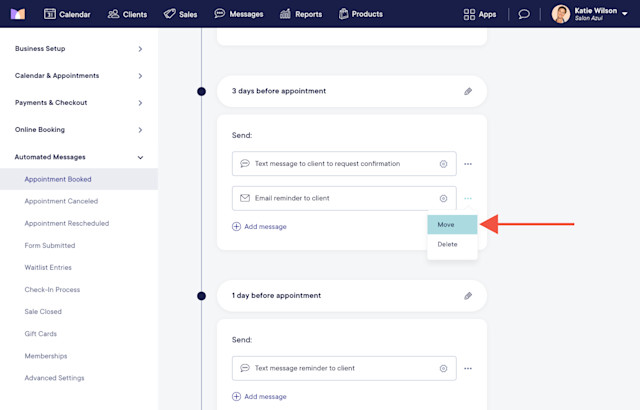
To change the timing of an automated message, use the pencil icon, or select Move from the "..." menu.

Can't find what you're looking for?
with us to talk to a real person and get your questions answered, or browse our on-demand videos.