Building and Activating a Flow
To build and activate a flow, you must be an Admin user, or you must have the Can manage flows permission enabled in Staff Member settings.
You can also book a 1:1 consultation call with our team if you need help creating flows or to discuss how you can use flows to drive more profit for your business.
Link copiedBuilding and activating a flow
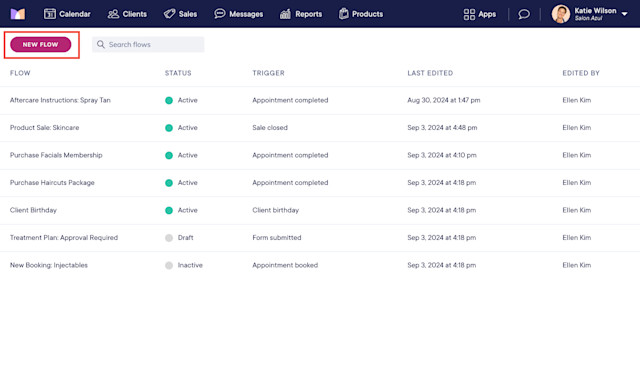
To build a flow, open the Flows app and select New Flow.
Select a pre-built flow to customize with your own messaging and settings, or build a flow from scratch by selecting a trigger.
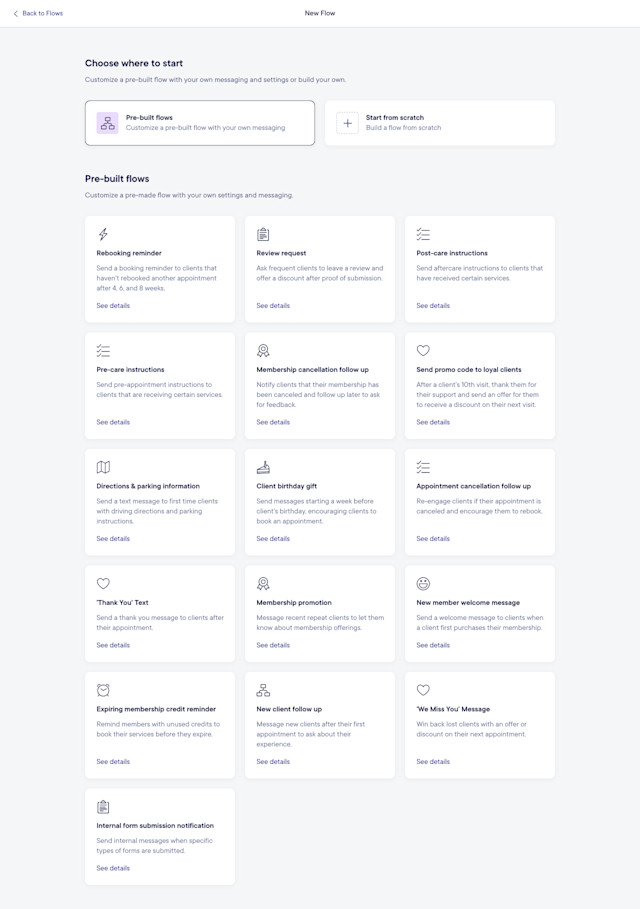
You can select from the following triggers when building a flow from scratch:
Trigger | Description | How you can filter this trigger |
|---|---|---|
Appointment completed | The flow will start when an appointment is completed on the calendar. | • Staff member • Service • Service category • Location • Resource • Appointment note • Date • Has incomplete forms |
Before appointment starts | The flow will start a set number of hours, days, or weeks before an appointment. | • Staff member • Service • Service category • Location • Resource • Appointment note • Date • Has incomplete forms |
Appointment booked | The flow will start when an appointment is booked on the calendar or through online booking. | • Staff member • Service • Service category • Location • Resource • Appointment note • Date • Has incomplete forms |
Appointment canceled | The flow will start when an appointment is canceled on the calendar or by the client. Includes appointments canceled due to a no-show. | • Staff member • Service • Service category • Location • Resource • Appointment note • Date • Has incomplete forms |
Membership started | The flow will start when a client’s first membership payment succeeds. | • Membership plan • Start date |
Membership canceled | The flow will start when a client's membership is canceled. | • Membership plan • Start date |
Form submitted | The flow will start when a form is submitted (including forms submitted for review). | • Form template |
Client birthday | The flow will start on or before the client’s birthday. | Choose to start the flow on or before the client’s birthday. |
Sale closed | The flow will start when a sale is closed. This can include membership sales (new memberships and renewals), and online gift card sales. | • Amount • Date • Location • Product • Product category • Service • Service category |
Before membership credits expire | The flow will start a set number of days or weeks before a client's membership credits expire. | • Membership plan • Start date |
Before package credits expire | The flow will start a set number of days or weeks before a client's package credits expire. | • Package type |
Once you select a pre-built flow or trigger, you can begin customizing the flow.
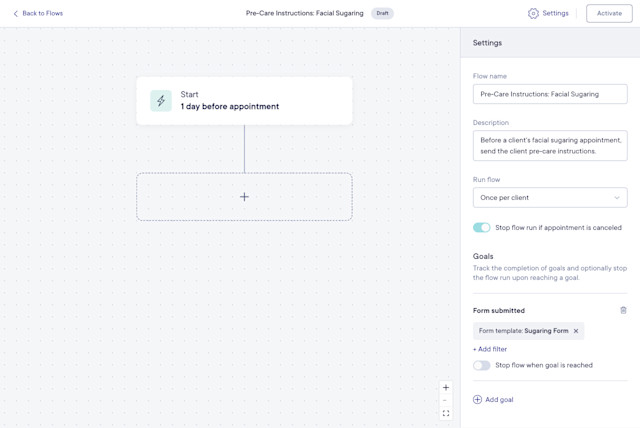
In the Settings panel, update the flow settings.
Flow name: Enter a name for the flow such as Parking Information or Waxing Pre-care Instructions.
Run flow: Specify when to run this flow.
Every time trigger occurs: Run this flow every time the trigger occurs. This option may cause the same client to receive the same messages every time this trigger occurs.
Once per appointment/sale: Run this flow once per appointment/sale. This ensures the flow will only run once, even if the appointment is rescheduled or the sale is reopened.
Once per client: Run this flow once per client. This is useful for sending one-time information such as parking instructions.
Once per time period & client: Run this flow once per time period and client. This allows you to specify how often a client can start the flow run (e.g. once every 3 months).
Stop if canceled: Enable this toggle if clients should be removed from a flow run if their appointment or membership is canceled.
Goals: Specify if this flow has one or more goals (optional).
The purpose of a goal is to help you see if a flow is effective. If the goal is for clients to start a membership, you can track the number and percentage of clients who started a membership after starting a flow run.
For each goal, specify if the client should be removed from the flow run when they reach the goal, or if they should continue through the flow run after reaching the goal.
Clients will still have seven days after they complete a flow run to reach a goal.
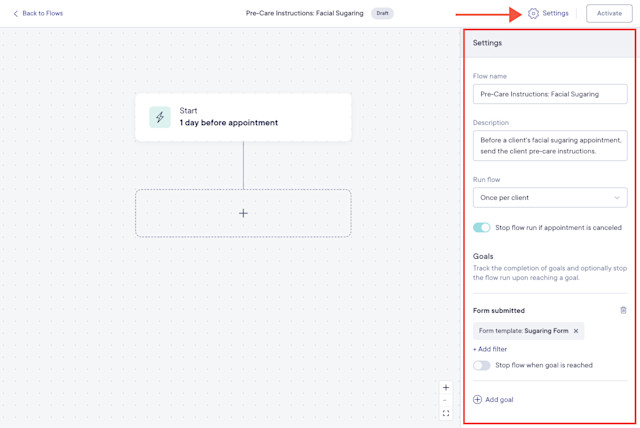
After updating the flow settings, customize the flow trigger.
For example, if you need to send pre-care instructions to new clients for your facial sugaring services, select the trigger and:
Add the Facial Sugaring service category
Add a condition to check if the client has had 0 past appointments (new clients)
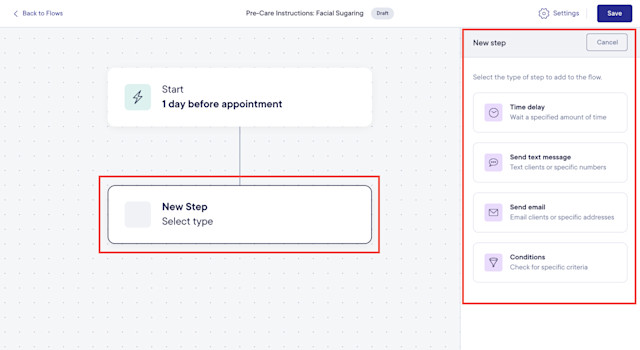
Once you’ve customized the flow trigger, add steps to the flow.
The table below outlines the available step types.
Step | Description |
|---|---|
Time delay | Wait a specific amount of time before completing the next step. Learn more about the time delay step. |
Send text message | Send a text message to the client or a specific phone number. Learn more about flow text messages and message pricing. |
Send email | Send an email to the client or a specific email address. Learn more about flow emails and message pricing. |
Conditions | Check for specific client criteria such as appointment history or membership status. This allows clients to take different paths based on whether they meet the criteria. Learn more about the available conditions. |
Add to account balance | If client account balances are enabled, add a specific amount to the client's account balance. Learn more about this step type. |
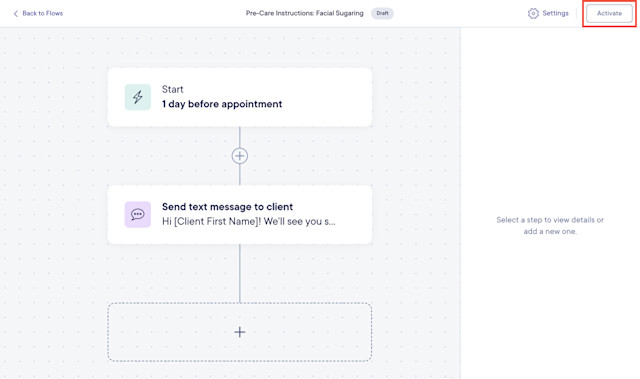
When you’re finished building the flow, you can activate it by selecting Activate.
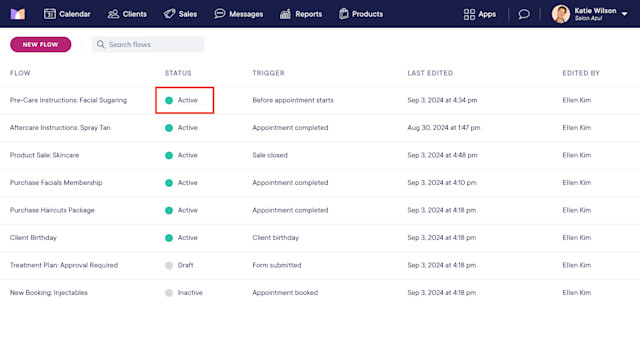
Once the flow is active, it will have a status of Active in the Flows app.
The flow will continue to run and use marketing credits unless it is deactivated.
The flow will be triggered by events that occur after the flow is activated. For example, for the Appointment Completed trigger, the flow will not be triggered for appointments completed before the flow was activated.
Learn more about editing and deactivating flows and viewing flow details & statistics.

Can't find what you're looking for?
with us to talk to a real person and get your questions answered, or browse our on-demand videos.