Enabling Web Chat
To enable web chat and customize your web chat settings, open the Settings app and go to Business Setup > Web Chat.
When you enable web chat:
If you have already integrated online booking with your website, web chat will be enabled on your website automatically.
If you have not integrated online booking with your website, copy your script tag from the Website Integration section and paste it in the HTML header section of your website.
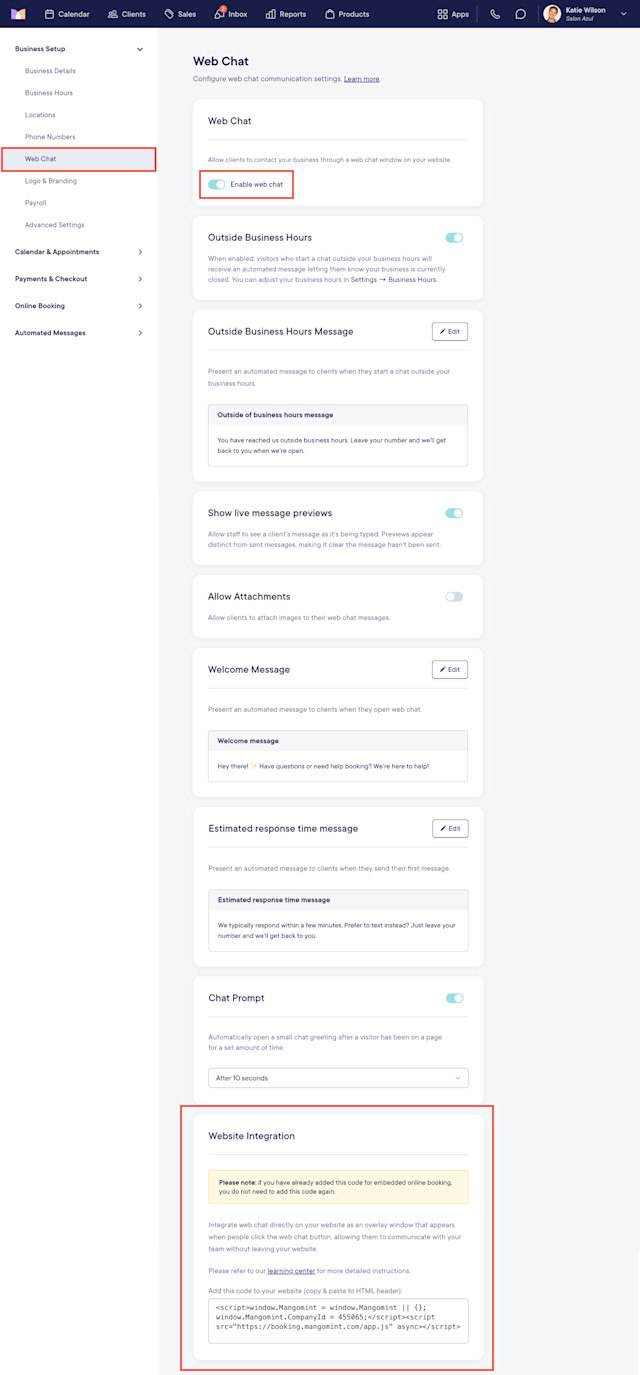
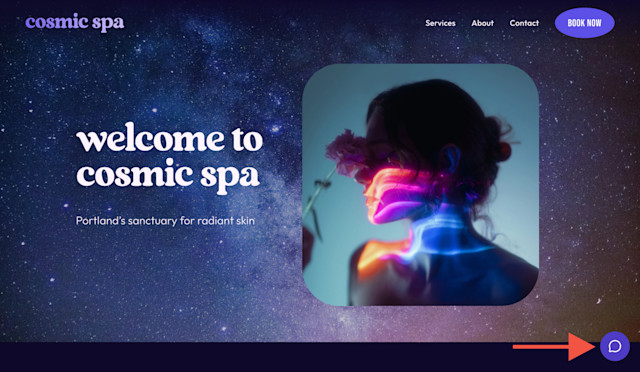
Once web chat is enabled, website visitors can select the chat icon in the lower-right corner of your website to send a chat message. Your chat icon and chat window will use the same logo and brand color as your online booking. Learn more about receiving web chat messages.
Link copiedOutside business hoursLink copied
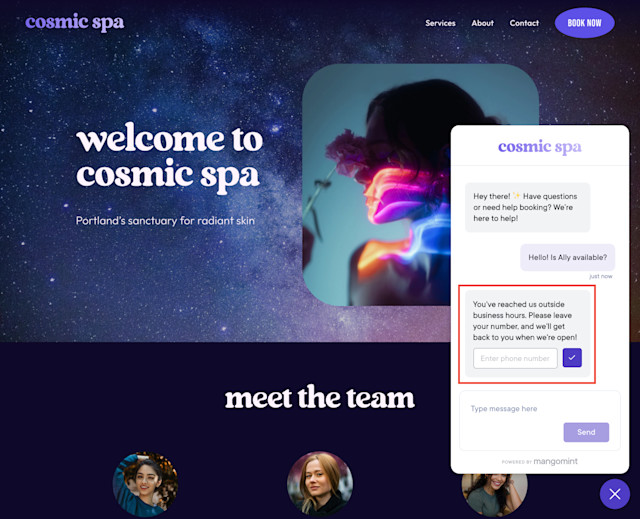
When enabled, if a website visitor sends a chat message outside your business hours, they will see an outside business hours message letting them know your business is closed.
This message can help you set clear expectations for your response time, and it allows website visitors to enter their phone number if they prefer to be contacted directly when the business is open. You can customize your outside business hours message as needed.
To adjust your business hours, open the Settings app and select Business Setup > Business Hours.
Link copiedShow live message previewsLink copied
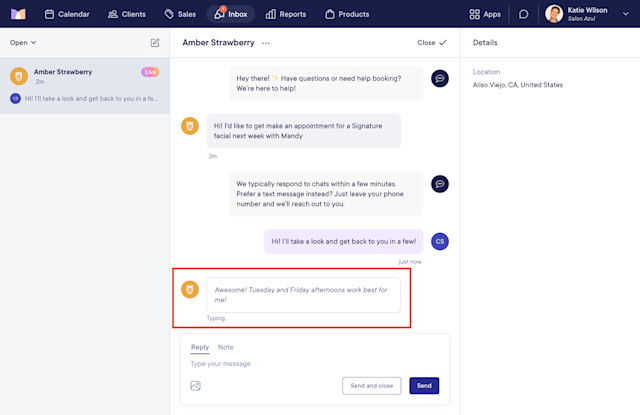
When enabled, staff members can see a website visitor's chat message as the message is being typed.
Link copiedAllow attachmentsLink copied
When enabled, website visitors can attach images to their web chat messages.
Link copiedWelcome messageLink copied
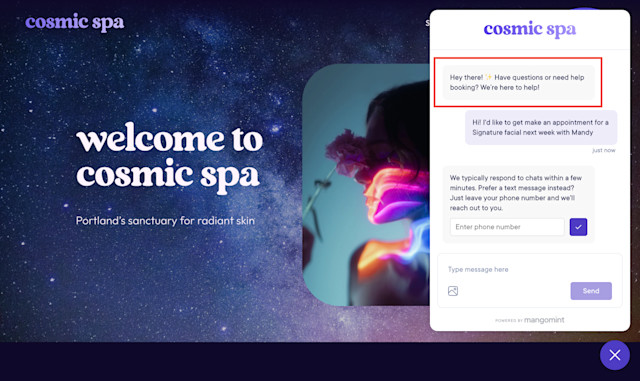
When a new website visitor opens your chat window, they will see a welcome message. You can customize your welcome message as needed.
Link copiedEstimated response time messageLink copied
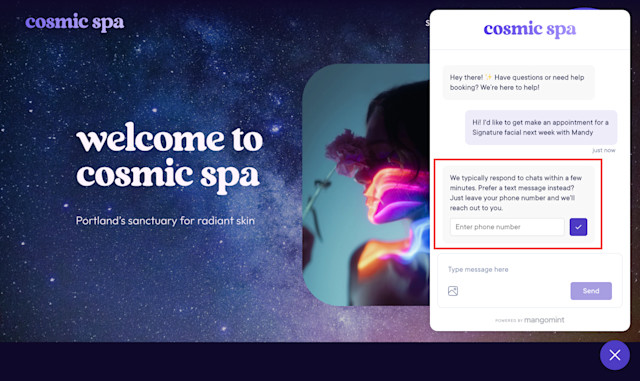
When a new website visitor sends their first chat message, they will see an estimated response time message that lets them know you typically respond in minutes. This message also allows them to enter their phone number if they prefer to be contacted directly. You can customize your estimated response time message as needed.
If a website visitor sends a chat message outside your business hours, they will see your outside business hours message (if enabled) instead of your estimated response time message.
Link copiedChat promptLink copied
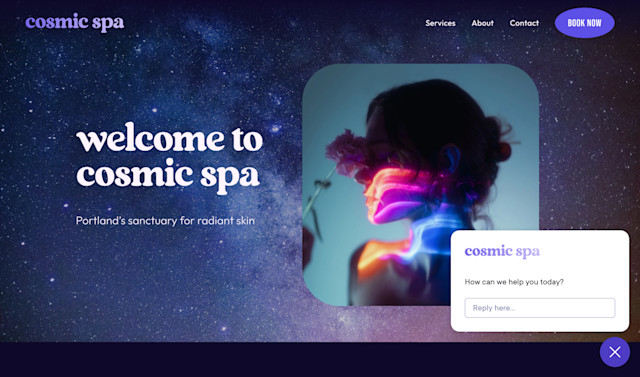
When enabled, a "How can we help you today?" prompt will display above your chat icon after a website visitor has been on your website for the selected number of seconds. This can help make website visitors aware that you have a chat feature if they have any questions.

Can't find what you're looking for?
with us to talk to a real person and get your questions answered, or browse our on-demand videos.